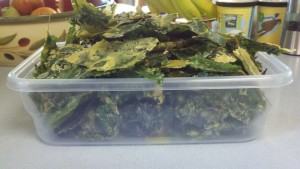
Drum roll please!
Here is my famous kale chip recipe for you… finally!
I’ve share my kale chips with so many people and everyone wants to have the recipe.
There are some very BORING, BLAND kale chip recipes out there, but not this one!
This recipe is great for people who are transitioning to a more healthy diet, for picky eaters, for junk food addicts who are addicted to potato chips and other chemical laden chips on the market.
Best Kale Chip Recipe For Junk Food Addicts
by Sheryl Mann
The amounts of the ingredients are estimates and can vary greatly and still be delicious. I teach intuitive food prep and cooking, so be creative.
Ingredients:
2-3 cups raw cashew pieces, soaked for 1-12 hours, drained and rinsed
3-5 T nutritional yeast
2 T soy sauce or Nama Shoyu (depending on how salty you like it)
juice of 3 organic oranges
juice of 1 organic lemon
Himalayan sea salt to taste
1/4 – 1/2 cup or so of filtered water to get consistency you want so it can pour, yet still be somewhat thick 1-2 large mixing bowls of kale, cleaned, stems removed, drained, torn into 2 inch size pieces
Steps:
Mix all the ingredients except the kale in the Vitamix or other high speed blender until smooth and creamy
Pour over the kale reserving a little sauce if you have too much. (You can always add more kale if you made too much sauce!)
Massage the kale for a few minutes to mix the sauce all over them and to ‘tenderize’ the kale, breaking the kale cell walls down
Place kale in single layer on Teflex sheets on dehydrator sheets or on a baking tray if you are using the oven. Put in dehydrator for several days or until crispy.
Set the dehydrator at 105F/41C and 115F/46C, no higher than 118F/47C. Keeping it at this range will keep the food “RAW” and thus preserving all the nutrients. When you get over that temp, you are ‘cooking’ the food and will get a loss of nutrients.
After about a day, you can flip the Teflex sheet over to dry the other side of the chips. If using the oven, put your oven on the lowest temp possible. They should just take a couple hours. Keep checking them until crispy. I’ve never done them in the oven so let me know how long it takes please (down in the comment section)
Place in airtight container. They will save for weeks, but most of the time they don’t last a day ’cause everyone eats them!! 🙂
Make sure you comment below and let me know how they turned out! Is there anything you’d add or change? Let us know and enjoy!

